Discover 5 stunning DIY cedar raised bed projects for herbs, veggies & flowers. Build elegant, durable garden beds fast with this 2025 step-by-step guide.
- ⚙️ Essential Tools & Materials for DIY Cedar Raised Bed Projects
- 🌿 Project 1 – Classic Corner Cedar Raised Bed
- 🌾 Project 2 – Tiered Cedar Raised Bed for Compact Gardens
- 🌱 Project 3 – Elevated Cedar Raised Bed for Accessibility
- 🧱 Project 4 – Modular Cedar Raised Bed with Detachable Panels
- 🌸 Project 5 – Decorative Cedar Raised Bed for Vegetables & Herbs
- ❓ FAQ – DIY Cedar Raised Bed (Schema Enabled)
- 💬 Conclusion – Crafting Beauty and Strength with a DIY Cedar Raised Bed
🌿 Introduction — Why DIY Cedar Raised Beds Are Every Gardener’s Dream
Ever dreamed of transforming a dull backyard corner into a lush, thriving garden within a single weekend? With a DIY cedar raised bed, that dream is closer than you think. Cedar is naturally rot-resistant, aromatic, and long-lasting — making it the perfect material for creating raised beds that blend beauty with durability.
Most gardeners hesitate, thinking it’s complicated or time-consuming to build their own raised beds. But here’s the truth: you don’t need to be a carpenter to create one. With a few cedar planks, screws, and some soil mix, you can build a sturdy, eco-friendly bed that lasts for years — all while keeping your vegetables and herbs safe from pests and soil erosion.
In this post, you’ll explore five stunning DIY cedar raised bed projects — from classic corner frames to tiered, elevated, and decorative designs. Each project is easy, rewarding, and crafted for gardeners who love both functionality and flair. By the end of this guide, you’ll be ready to build your own raised bed and enjoy the satisfaction of watching your plants flourish in style. 🌱
🪵 Why Choose Cedar for Your Raised Beds
When it comes to crafting a DIY cedar raised bed, the material you choose determines how long your garden will thrive. Cedar is a gardener’s favorite for good reason — it’s naturally rot-resistant, insect-repellent, and beautiful to look at. Unlike pine or composite wood, cedar doesn’t require chemical treatment to withstand years of exposure to sun, rain, and soil moisture.
This makes it the perfect eco-friendly choice for growing vegetables and herbs safely. A DIY cedar raised bed also offers unmatched durability — lasting 10 to 15 years without major maintenance. Its aromatic oils act as a natural barrier against pests, keeping your plants healthy while reducing the need for chemical repellents.
Beyond its resilience, cedar brings a warm, rustic appeal to your garden layout. The rich reddish hue of freshly cut boards gradually ages into an elegant silver-gray patina, blending beautifully with greenery. Whether you’re building your first small bed or upgrading your outdoor space, using cedar guarantees strength, sustainability, and timeless design in one project.
Pro Tip: Always choose untreated cedar boards to ensure your raised bed remains completely organic and food-safe.
⚙️ Essential Tools & Materials for DIY Cedar Raised Bed Projects
Building a DIY cedar raised bed is easier than most gardeners imagine — especially when you have all your tools and materials ready beforehand. Preparation is key to saving time and achieving a flawless finish. Below is a comprehensive list of what you’ll need, along with tips to make your building process smooth, safe, and enjoyable.
🧰 Tools You’ll Need
| Tool | Purpose | Pro Tip |
| Measuring Tape | For accurate board measurements and even spacing. | Double-check all cuts before drilling. |
| Power Drill or Screwdriver | To fasten cedar boards securely. | Use a torque-limiting drill bit to prevent splitting. |
| Circular Saw or Hand Saw | For cutting cedar planks to the desired size. | Mark cuts clearly with a pencil and square edge. |
| Level Tool | To ensure perfect alignment and balance. | Level both sides before tightening screws. |
| Safety Gear | Gloves, eye goggles, and mask for safe handling. | Cedar dust can irritate — wear protection. |
🪵 Materials Required
| Material | Quantity | Use |
| Cedar Planks (2×6 or 2×8) | 6–8 boards | The main structure of your raised bed. |
| Galvanized Screws (2.5”–3”) | 20–24 pieces | For assembling cedar planks securely. |
| Corner Brackets (optional) | 4 pieces | For reinforcing corners and stability. |
| Landscape Fabric | Enough to cover bed base | Prevents weed growth from underneath. |
| Compost and Topsoil Mix | As needed | The growing medium for your plants. |
| Perlite or Sand | 1–2 bags | Improves soil aeration and drainage. |
🧱 Choosing the Right Cedar Boards
Cedar comes in various grades and types — Western Red Cedar and Eastern White Cedar being the most popular for garden use. Choose untreated cedar to keep your soil organic and chemical-free. Planks should ideally be between 1–2 inches thick for sturdiness.
Inspect boards for cracks or knots, as weak spots can compromise the frame’s durability over time. If you’re building a DIY cedar raised bed meant to last several years, investing in high-quality boards will pay off with minimal maintenance.
🌿 Preparing Your Work Area
Before cutting or assembling, lay out your boards on a flat, open surface. Sweep the area clean of stones or debris. If possible, work outdoors or in a ventilated space, since cedar releases fine aromatic sawdust when cut.
Use painter’s tape to mark dimensions visually on the ground—it helps in visualizing how your raised bed will look once placed.
Pro Tip: Set up your raised bed near a water source but away from areas prone to flooding. Accessibility and sunlight exposure matter just as much as good construction.
🪚 Estimated Cost & Time Breakdown
| Item | Estimated Cost (USD) | Time Required |
| Cedar Planks | $40–$50 | 20 minutes (cutting & layout) |
| Screws + Brackets | $10–$15 | 10 minutes (assembly) |
| Tools & Safety Gear | $0–$20 (if not owned) | — |
| Soil & Compost Mix | $25–$30 | 15 minutes (filling) |
| Total Investment | $75–$100 | ≈1 Hour 15 Minutes |
🌸 Bonus Tip: Keep Sustainability in Mind
Cedar is biodegradable and eco-friendly, but always source it from FSC-certified suppliers to ensure your wood comes from responsibly managed forests. This supports sustainable gardening and aligns your project with green-living values.
When your DIY cedar raised bed eventually reaches the end of its lifespan, the wood can be repurposed into compost frames, edging, or smaller herb planters—nothing goes to waste.
nxt please.
ChatGPT said:
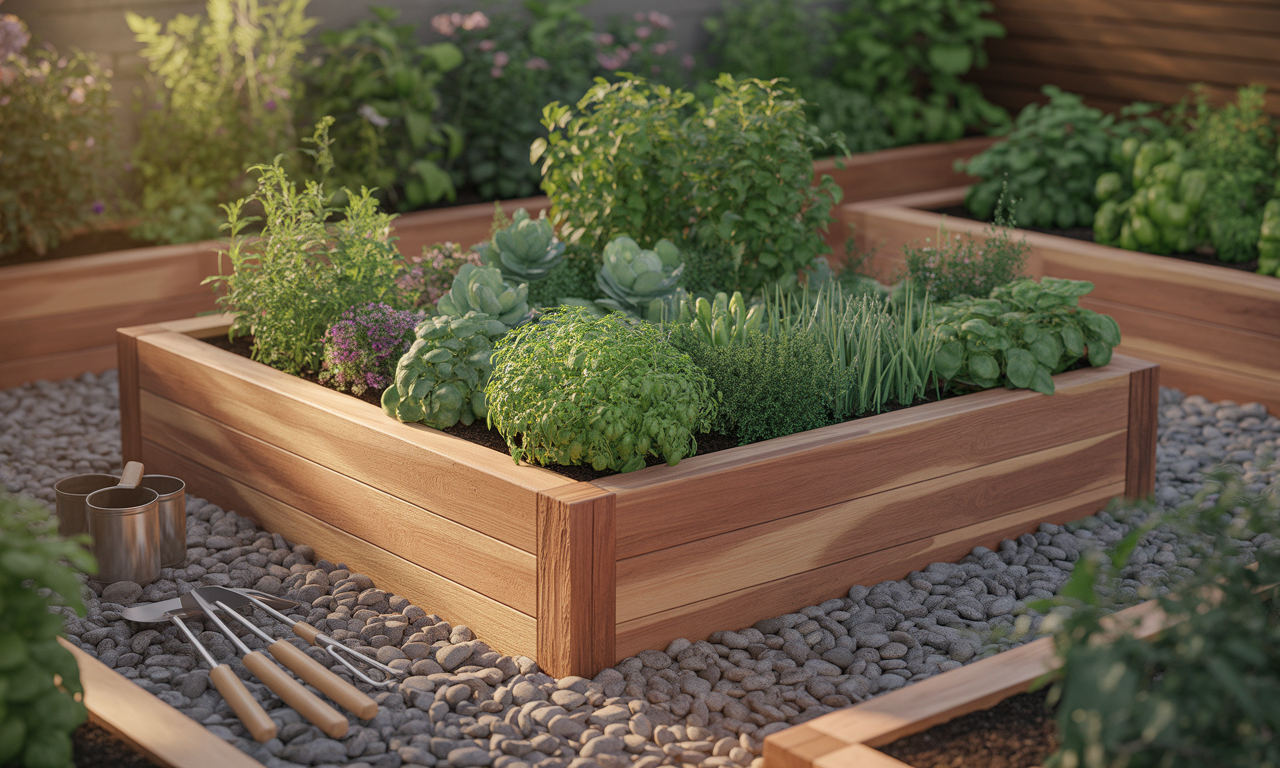
🌿 Project 1 – Classic Corner Cedar Raised Bed
If you’re new to garden woodworking, the Classic Corner Cedar Raised Bed is the perfect place to start. It’s simple, sturdy, and timeless — a true essential for anyone building their first DIY cedar raised bed. This design focuses on functionality without sacrificing elegance, allowing your plants to thrive in nutrient-rich soil while elevating the aesthetic of your outdoor space.
🪵 Why Start with the Classic Design
Many beginners overthink their first raised bed project, worrying about angles, joints, or custom dimensions. The beauty of this design lies in its simplicity and symmetry. It only takes four corner joints, a handful of screws, and less than two hours of your weekend. Once built, you’ll have a solid, long-lasting foundation that can host vegetables, herbs, or flowers for years.
The DIY cedar raised bed also improves drainage and keeps weeds at bay, meaning less maintenance and healthier roots. Its clean edges blend beautifully into both small and large gardens, making it a versatile choice for every type of gardener.
⚙️ Measurements & Layout
| Dimension | Ideal Size | Description |
| Length | 4 ft | Easy to reach from all sides |
| Width | 4 ft | Perfect square balance for even planting |
| Height | 12–16 in | Prevents root crowding and soil erosion |
Pro Tip: Stick to the 4×4 layout for your first project — it’s ergonomically perfect and prevents you from overreaching while gardening.
🧱 Step-by-Step Construction Guide
Step 1: Cut and Arrange the Boards
Lay your cedar planks flat on the ground. Cut four boards for the sides and four shorter ones for the ends (typically 4 ft × 1 ft pieces). Sand any rough edges to avoid splinters and ensure a neat finish.
Step 2: Create Corner Posts
Use 2×2 cedar posts (16 inches tall) at each corner. These posts act as your main support structure. You’ll attach the longer and shorter sideboards directly to these posts to form a box.
Step 3: Assemble the Frame
Drill two galvanized screws into each board end, securing them into the posts. Repeat this for all corners until the frame stands upright. For extra durability, reinforce corners using metal L-brackets — especially if your garden receives heavy rain or you plan deep soil layers.
Step 4: Level the Base
Choose a sunny spot and clear away debris or grass where the bed will sit. Use a level tool to make sure all sides are even; an uneven base can cause water pooling or pressure cracks later.
Step 5: Line and Fill
Place a layer of landscape fabric at the bottom to stop weeds from creeping in. Then fill your DIY cedar raised bed with a mix of compost, garden soil, and perlite in a 40:40:20 ratio for optimum aeration.
🌱 Planting Tips
- Start with root-friendly plants like carrots, radishes, and onions.
- Add herbs like parsley or basil around the corners to maximize space.
- Avoid overpacking the bed — each plant should have breathing room.
Cedar’s natural oils deter many garden pests, so you’ll notice fewer issues with insects or fungal rot. The soil also warms up faster in spring, allowing for early planting.
💡 Quick Summary Table
| Feature | Benefit |
| Construction Time | 60–90 minutes |
| Cost | Around $70 |
| Lifespan | 10–15 years |
| Difficulty | Beginner-friendly |
| Maintenance | Minimal |
| Aesthetic Appeal | Classic, rustic, and natural look |
🌿 Why Gardeners Love This Project
- It’s beginner-proof and cost-effective.
- Fits perfectly in both small and large gardens.
- Enhances soil health and boosts crop yield.
- Can be easily customized with corner caps or painted trims.
Once you’ve built this base model, you’ll gain the confidence to experiment with more advanced designs later in this guide. And that’s the joy of starting small — your DIY cedar raised bed will teach you patience, precision, and pride in your own green creations. 🌸
🌾 Project 2 – Tiered Cedar Raised Bed for Compact Gardens
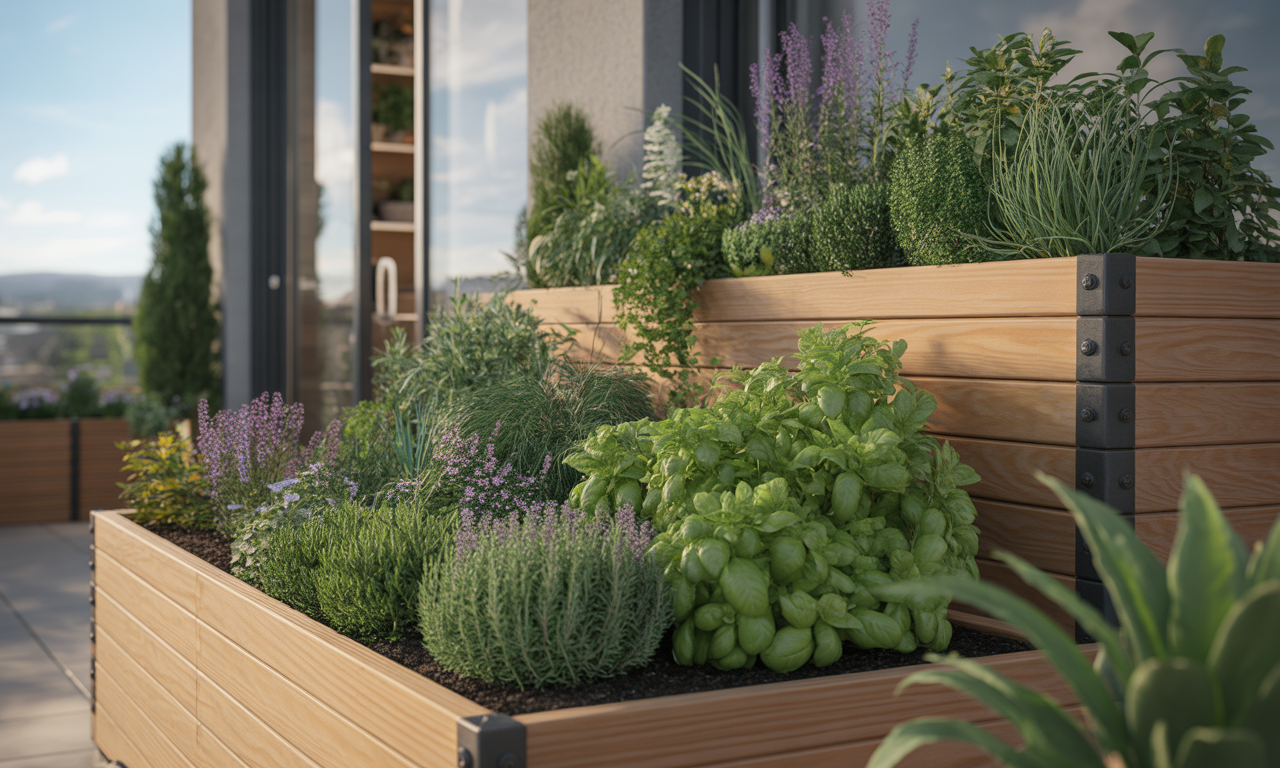
Not everyone has the luxury of a sprawling backyard — and that’s where the Tiered Cedar Raised Bed becomes a game changer. Perfect for balconies, patios, or tight garden corners, this design maximizes your vertical space while maintaining elegance and efficiency. The layered structure allows you to grow multiple plant varieties in different soil depths — all within one beautiful DIY cedar raised bed.
🌿 Why Choose a Tiered Design
If you’ve ever struggled to fit all your favorite herbs, flowers, and vegetables into one area, this design solves that problem instantly. The multi-level layout provides separate zones for shallow-rooted herbs like basil and thyme, medium-rooted flowers, and deep-rooted vegetables such as carrots or tomatoes.
Beyond practicality, the tiered structure adds stunning dimension to your garden. It creates a natural cascade effect, making your small space look lush and full. Plus, cedar’s natural color contrasts beautifully with green foliage, giving your garden a handcrafted designer touch.
📏 Recommended Dimensions & Layout
| Tier | Length | Width | Height | Ideal Plants |
| Top Tier | 2 ft | 2 ft | 8 in | Herbs, strawberries |
| Middle Tier | 3 ft | 3 ft | 12 in | Lettuce, spinach |
| Bottom Tier | 4 ft | 4 ft | 16 in | Tomatoes, carrots, peppers |
Pro Tip: Leave at least 2–3 inches of space between each level for better root ventilation and easy watering.
🧱 Step-by-Step Building Process
Step 1: Cut the Boards
Measure and cut cedar planks for all three tiers. You’ll need four boards for each level — 12 total. Sand all edges lightly for smooth assembly.
Step 2: Assemble Each Tier Separately
Build the bottom frame first using the same method as the classic bed — screws through corner posts. Repeat this process for the middle and top tiers.
Step 3: Stack and Secure the Tiers
Place the smallest box at the top and the largest at the bottom. Use galvanized corner brackets or long deck screws to secure tiers together, ensuring they align symmetrically. The stepped pyramid effect should look even from all sides.
Step 4: Line and Fill Each Tier
Use landscape fabric inside each tier to prevent weeds. Then fill with layers of compost, soil, and perlite. The top tier needs lighter, faster-draining soil, while the bottom can hold richer, denser soil for deep roots.
Step 5: Plant in Layers
- Top Tier: Grow herbs like mint, thyme, and parsley.
- Middle Tier: Ideal for lettuce, spinach, or marigolds.
- Bottom Tier: Perfect for deep-rooted vegetables or flowering plants.
🌸 Design Enhancements for Small Gardens
- Paint or stain your cedar in earth tones to enhance aesthetics.
- Add drip irrigation for easy watering across all tiers.
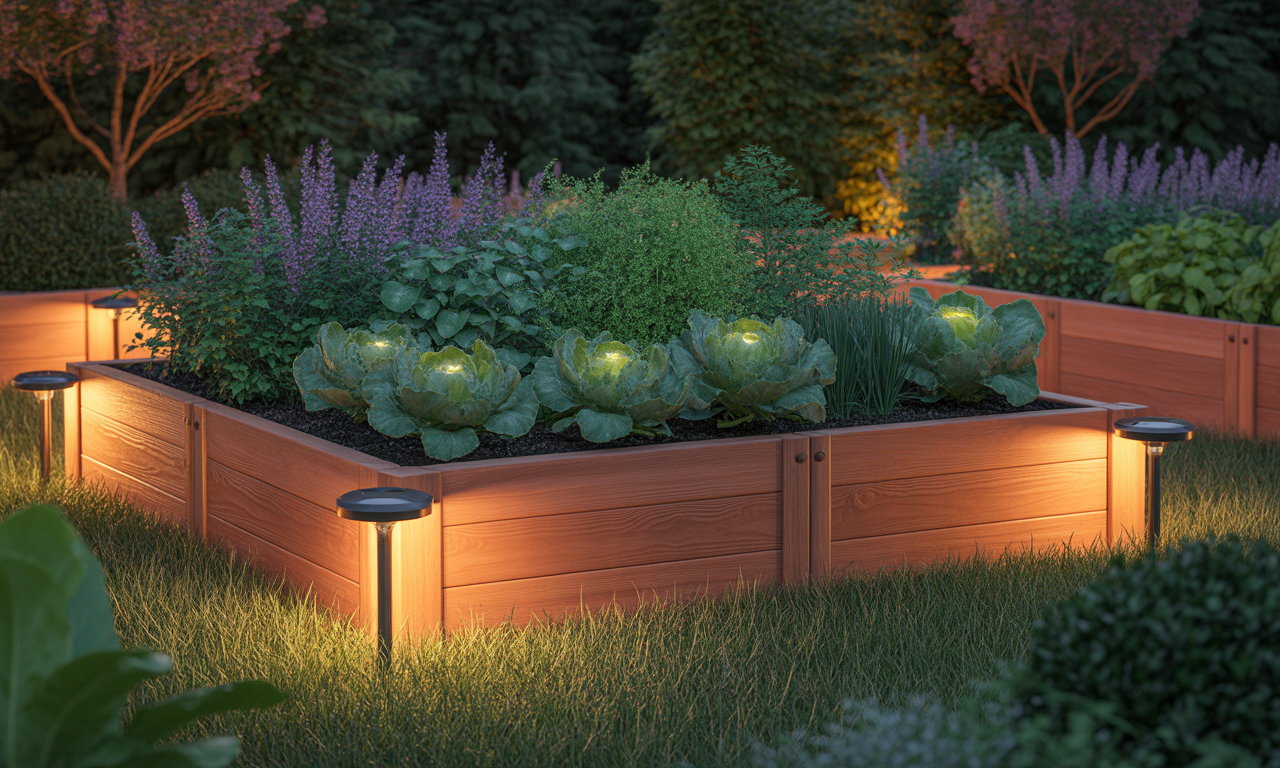
- Install solar garden lights between tiers for an elegant nighttime glow.
Pro Tip: Position your tiered bed where it receives at least 6 hours of sunlight daily. The upper tiers dry out faster, so regular watering ensures balanced moisture.
💧 Maintenance Tips
The tiered structure may dry unevenly due to vertical airflow. Check soil moisture at different levels regularly. Apply mulch or straw to retain water, especially during hot summers. Since cedar resists decay naturally, your bed will remain sturdy through multiple growing seasons with minimal care.
For pest control, consider companion planting — marigolds in lower tiers deter nematodes and whiteflies from nearby vegetable roots.
🪴 Quick Overview Table
| Feature | Benefit |
| Ideal For | Compact spaces, patios, and small gardens |
| Build Time | 2–3 hours |
| Difficulty | Intermediate |
| Estimated Cost | $90–$120 |
| Lifespan | 10–12 years |
| Aesthetic | Multi-level, modern look |
🌿 Why Gardeners Love It
The DIY cedar raised bed with a tiered design combines art with utility. It’s the perfect choice for gardeners who want variety in limited space without clutter. It also helps organize plants based on their water and sunlight needs — a smart way to manage growth efficiently.
Building one of these not only saves space but also gives you a satisfying sense of structure and creativity in your garden — a sign of thoughtful, sustainable design that continues to reward you season after season.
🌱 Project 3 – Elevated Cedar Raised Bed for Accessibility
Gardening should be joyful, not physically demanding — and that’s exactly what an Elevated Cedar Raised Bed offers. Ideal for seniors, urban gardeners, and anyone who prefers to garden comfortably while standing or sitting, this design transforms the traditional DIY cedar raised bed into an ergonomic masterpiece. You’ll save your back, knees, and time while keeping all your plants within easy reach.
💪 Why Choose an Elevated Design
Traditional garden beds often require constant bending, which can strain your back and joints. The elevated structure eliminates that hassle by lifting the garden up to waist height — usually 30 to 36 inches. This makes planting, watering, and harvesting effortless.
But the benefits go beyond comfort. The raised design enhances drainage, prevents soil compaction, and discourages pests like snails or slugs that usually crawl up from ground level. When built with cedar, it also provides durability, weather resistance, and natural pest deterrence — all in one sleek design.
An elevated DIY cedar raised bed brings together sustainability, functionality, and accessibility. Whether you live in an apartment, senior-friendly home, or small urban patio, this garden bed design ensures you can grow fresh herbs, greens, and flowers year-round without heavy physical labor.
📏 Dimensions & Structural Layout
| Component | Measurement | Notes |
| Length | 4 ft | Easy access from both sides |
| Width | 2 ft | Compact footprint for balconies and decks |
| Height | 32–36 in | Comfortable standing height |
| Leg Posts | 4×4 Cedar, 3 ft | Supports full soil load |
| Bed Depth | 10–12 in | Ideal for vegetables and herbs |
Pro Tip: Keep the height uniform for stability, and add a bottom support frame using 2×4 crossbeams for weight distribution.
⚙️ Step-by-Step Building Guide
Step 1: Build the Frame
Cut four sideboards and attach them with screws to form a rectangle. Use corner posts at each end for support. The structure resembles a standard DIY cedar raised bed, except it’s mounted on sturdy legs.
Step 2: Add Bottom Panels
Line the bottom with cedar slats or plywood sheets spaced slightly apart (¼-inch gaps) for drainage. Secure them with galvanized screws.
Step 3: Reinforce the Legs
Attach 2×4 cedar braces between legs using metal brackets to improve stability, especially for longer beds. Elevated beds can hold 200–300 pounds of soil, so a solid base is essential.
Step 4: Add Landscape Fabric
Place heavy-duty landscape fabric inside the frame to hold soil and prevent leakage. Use a staple gun to fix it along the edges.
Step 5: Fill and Plant
Add a well-balanced soil mix — 40% compost, 40% topsoil, and 20% perlite. This lightweight mixture ensures proper drainage while keeping roots healthy.
🌿 Best Plants for Elevated Beds
| Category | Plant Examples | Benefit |
| Herbs | Basil, chives, mint | Easy harvesting and fragrance |
| Leafy Greens | Lettuce, spinach, kale | Quick growth, minimal maintenance |
| Flowers | Petunias, pansies, marigolds | Add beauty and pollinator appeal |
Pro Tip: Use compact or trailing plants along the edges to create a cascading visual effect that softens the raised structure.
🧩 Design Enhancements
- Add Wheels: Attach locking caster wheels to move your bed easily between sun and shade.
- Install a Shelf: Create a lower storage rack for pots, tools, and fertilizers.
- Attach a Trellis: Great for vertical crops like peas or beans.
- Include a Drip Irrigation Line: Keeps moisture levels consistent without overwatering.
Each of these small upgrades elevates your DIY cedar raised bed into a high-efficiency gardening workstation.
💧 Maintenance & Seasonal Care
Cedar requires minimal maintenance, but regular checks help your bed last longer:
- Reapply linseed oil annually to preserve color and resist moisture.
- Avoid water pooling at leg joints — elevate the base slightly with bricks or blocks.
- During winter, cover the soil with mulch or compost to retain nutrients.
🌸 Why Gardeners Love It
- Ideal for accessible gardening — no more bending or kneeling.
- Cedar construction ensures durability and pest protection.
- Saves time, space, and effort while maintaining high yields.
- Suitable for both outdoor patios and indoor sunlit areas.
⚙️ Summary Table
| Feature | Details |
| Build Time | 2–3 hours |
| Cost | $100–$130 |
| Difficulty | Moderate |
| Lifespan | 12–15 years |
| Accessibility | Excellent |
| Ideal Use | Urban balconies, small yards, senior gardens |
🌿 Final Thoughts on Elevated Design
An elevated DIY cedar raised bed isn’t just practical — it’s empowering. It makes gardening inclusive for everyone, from busy professionals to retirees. The elevated form keeps everything neat, organized, and visually appealing while making your gardening journey effortless and enjoyable.
If comfort and convenience top your list, this is the design that will redefine how you connect with your plants.
🧱 Project 4 – Modular Cedar Raised Bed with Detachable Panels
If you love flexibility in your garden design, the Modular Cedar Raised Bed with Detachable Panels is your next big upgrade. This innovative version of a DIY cedar raised bed offers both adaptability and style — perfect for gardeners who like to rearrange, expand, or refresh their garden layout with ease.
Unlike fixed frames, a modular design allows you to add or remove sections depending on your space, season, and planting goals. Whether you want a compact bed for herbs in spring or a longer layout for vegetables in summer, this project lets you transform your garden in minutes — without rebuilding from scratch.
🌿 Why Choose a Modular Cedar Design
The modular format gives gardeners control and creativity. It’s ideal for renters or small-space gardeners who may need to relocate or reconfigure their beds. Each section is lightweight yet durable, thanks to cedar’s natural weather resistance.
Plus, detachable panels make soil replacement, cleaning, and rotation incredibly easy. You can refresh the soil annually without heavy lifting or disassembling the entire structure. The DIY cedar raised bed with a modular twist is all about practicality meeting long-term sustainability.
📏 Recommended Dimensions & Layout Options
| Configuration | Dimensions | Best Use |
| Single Module | 3 ft × 3 ft × 12 in | Compact balcony or patio use |
| Double Module | 6 ft × 3 ft × 12 in | Vegetables and herbs |
| L-Shape | 6 ft × 6 ft × 12 in | Corner gardens |
| U-Shape | 8 ft × 8 ft × 12 in | Large walk-in garden area |
Pro Tip: Start with two connected modules and expand later as your garden grows. It’s more efficient than overcommitting space initially.
⚙️ Step-by-Step Building Instructions
Step 1: Create Individual Panels
Cut cedar boards into four equal sides for each panel. Attach each side using galvanized screws and corner locking brackets that allow easy detachment.
Step 2: Design the Connector System
Use slide-in joints or bolt latches between panels. This system lets you assemble and disassemble your raised bed quickly. Some gardeners prefer hinged connections for easy folding and storage.
Step 3: Assemble the Base Modules
Build each rectangular section separately. Once the modules are complete, connect them together to form your desired layout. For example, align two modules side by side for a double bed or join three for a U-shape.
Step 4: Add Support Stakes
To maintain structural integrity, insert cedar stakes into each corner joint. This adds stability and prevents soil pressure from widening the sides.
Step 5: Line and Fill
Line the interior with weed barrier fabric, then fill each module with your ideal garden soil blend — 40% compost, 40% topsoil, and 20% sand or perlite.
🌸 Planting Ideas for Modular Beds
| Section | Recommended Plants | Reason |
| Corner Sections | Tomatoes, peppers | Deep-rooted, need strong support |
| Center Section | Lettuce, spinach, kale | Fast-growing greens |
| Edge Panels | Herbs or marigolds | Pest control and fragrance |
By planting strategically, you’ll achieve a dynamic and colorful garden that’s both functional and visually engaging.
🧩 Customization & Upgrades
- Add Height Extensions: Stack modules vertically to create multi-layer planters.
- Mix Materials: Combine cedar panels with metal corners for a modern look.
- Integrated Irrigation: Run a drip line through the panel joints for automated watering.
- Easy Winter Storage: Simply detach the panels and store them flat indoors.
Each modification enhances both convenience and creativity, making your DIY cedar raised bed a future-proof investment.
💧 Maintenance & Seasonal Adjustments
Cedar’s natural oil protects it from decay, but always check the bracket joints every season for tightness. If any section loosens, a quick screw adjustment will keep it secure.
Before winter, remove or rearrange panels to prevent moisture buildup in colder regions. This modular approach helps extend the bed’s lifespan to well over 12 years.
Pro Tip: For maximum durability, seal the inner surfaces with eco-friendly linseed oil — it preserves the cedar’s warm hue while repelling excess moisture.
🌿 Benefits at a Glance
| Feature | Benefit |
| Expandable Design | Add or remove sections anytime |
| Detachable Panels | Easy soil replacement & maintenance |
| Durability | 10–12 years with minimal care |
| Build Time | 3–4 hours |
| Difficulty | Moderate |
| Aesthetic Appeal | Modern, geometric garden design |
🌸 Why Gardeners Love Modular Beds
The modular DIY cedar raised bed appeals to modern gardeners who value freedom and sustainability. It adapts to evolving spaces, supports companion planting, and adds professional elegance to any garden setup.
Most importantly, this design transforms gardening from a fixed chore into an evolving creative experience. You can start small, expand later, and enjoy complete control over how your garden grows — one module at a time. 🌱
🌸 Project 5 – Decorative Cedar Raised Bed for Vegetables & Herbs
If you believe gardening is both an art and a science, the Decorative Cedar Raised Bed is your masterpiece in the making. This version of a DIY cedar raised bed beautifully merges form and function — giving your garden a touch of elegance while still maintaining the practicality of high-yield planting.
It’s ideal for gardeners who value aesthetics as much as performance. You’ll enjoy the visual charm of handcrafted cedar wood while growing your favorite herbs and vegetables in perfectly balanced soil. From rustic countryside gardens to modern patios, this project elevates the overall look of your space, proving that even the most productive gardens can look absolutely stunning.
🌿 Why Build a Decorative Cedar Bed
Most raised beds are built for utility, but this project focuses on visual harmony and creative expression. The smooth grain and rich reddish tones of cedar instantly add warmth and texture to your garden. When paired with ornamental edging or floral borders, it turns into a showpiece.
A DIY cedar raised bed designed for both vegetables and herbs ensures better crop organization while maintaining aesthetic balance. You can use this bed to grow everything — from lush basil to fragrant rosemary and colorful lettuces — arranged in artistic symmetry.
Cedar’s natural resistance to decay ensures your structure stays beautiful season after season, with minimal upkeep. As it ages, the wood weathers into a soft silvery-gray tone, blending gracefully with greenery and flowers around it.
📏 Dimensions & Layout Recommendations
| Bed Style | Dimensions | Best Use |
| Rectangle | 6 ft × 3 ft × 14 in | Ideal for vegetables and herbs |
| Circular | 5 ft diameter × 12 in | For decorative flower-herb mixes |
| Border-Style | 10 ft × 1.5 ft × 10 in | For garden edging or pathways |
Pro Tip: Choose a central garden spot for this bed to serve as a focal point. Surround it with pebble paths or terracotta tiles for a designer look.
🧱 Step-by-Step Decorative Build
Step 1: Frame the Foundation
Start with four cedar planks for the main frame. Sand the surfaces thoroughly to bring out the natural wood grain. Use galvanized screws or decorative brass bolts to enhance the premium look.
Step 2: Add Ornamental Edging
Attach beveled or carved cedar trims to the top edges for a finished appearance. You can also use curved corner caps for a soft, elegant profile.
Step 3: Line the Bed
Place landscape fabric or jute lining at the bottom to prevent soil leakage and weed growth. Ensure the material overlaps the corners slightly for complete coverage.
Step 4: Fill with Enriched Soil Mix
For a balanced growing medium, combine:
- 40% organic compost
- 40% topsoil
- 20% perlite or sand for aeration
This mix promotes strong root development and nutrient retention — perfect for growing a mix of herbs and vegetables.
Step 5: Plant in Patterns
Arrange plants artistically:
- Outer layer: Trailing herbs like thyme or oregano.
- Middle layer: Bushy herbs such as basil or parsley.
- Center section: Taller vegetables like kale, chard, or cherry tomatoes.
This creates a cascading, layered effect that adds depth and movement to your DIY cedar raised bed.
🌸 Design Enhancements
- Add a Trellis: Integrate a wooden or metal trellis for climbing plants like beans or cucumbers.
- Paint & Seal: Apply a clear waterproof sealant or eco-friendly stain to maintain cedar’s color.
- Add Lighting: Use solar-powered garden lights along the edges to highlight your bed at night.
- Mix Textures: Combine smooth cedar with river stones or brick edging for contrast.
Pro Tip: Decorative cedar beds work beautifully as centerpieces for rooftop gardens or small courtyards — where form matters as much as function.
🌿 Companion Planting Ideas
| Category | Plant Combinations | Benefit |
| Aromatic Herbs | Basil, rosemary, sage | Repels pests and adds fragrance |
| Leafy Vegetables | Spinach, lettuce, kale | Quick harvest and vibrant greens |
| Edible Flowers | Marigold, nasturtium | Natural pest deterrents |
| Root Crops | Radish, carrots | Grow compactly in deeper soil layers |
These combinations not only make your bed visually appealing but also enhance plant health through natural pest control and nutrient sharing.
💧 Maintenance & Seasonal Touch-Ups
- Refresh soil each spring by adding a layer of compost.
- Clean trims and reapply linseed oil once a year.
- Rotate crops annually to prevent nutrient depletion.
- Use mulch to retain soil moisture and reduce weeds.
🌱 Why Gardeners Love Decorative Beds
- Turns everyday gardening into a visual experience.
- Durable, chemical-free cedar guarantees both beauty and longevity.
- Supports versatile planting — vegetables, herbs, and flowers together.
- Perfect for homeowners who want their garden to reflect style and sustainability.
💡 Summary Table
| Feature | Details |
| Aesthetic Appeal | Premium, elegant look |
| Build Time | 3–4 hours |
| Cost | $120–$150 |
| Lifespan | 12–15 years |
| Maintenance | Low |
| Ideal For | Stylish home gardens, patios, rooftops |
🌸 Final Thoughts
The decorative DIY cedar raised bed is more than a gardening project — it’s an expression of your personality and creativity. Every cut, curve, and planted herb tells a story of care and artistry.
Cedar’s timeless beauty ensures that your garden remains a serene escape filled with life, fragrance, and color. By blending design with durability, you’re not just growing plants — you’re cultivating elegance.
❓ FAQ – DIY Cedar Raised Bed (Schema Enabled)
Q1: How long does a DIY cedar raised bed typically last?
A DIY cedar raised bed can easily last between 10 to 15 years when built using high-quality, untreated cedar wood. Cedar naturally contains oils that resist rot, mold, and insects. For longer durability, apply a thin coat of natural linseed oil annually and ensure proper drainage to prevent waterlogging.
Q2: Is building a DIY cedar raised bed difficult for beginners?
Not at all! One of the biggest advantages of a DIY cedar raised bed is its simplicity. With just a few tools — a drill, screws, and planks — even beginners can construct a sturdy, stylish garden bed in just a few hours. Many gardeners find it easier than expected once they follow step-by-step guides and pre-plan their layout.
Q3: What type of soil mix works best for cedar raised beds?
The best soil blend for a DIY cedar raised bed is a mix of 40% compost, 40% topsoil, and 20% perlite or sand. This combination ensures good drainage, proper aeration, and nutrient balance for vegetables, herbs, and flowers. Avoid using heavy clay soil as it restricts root growth and can compact over time.
Q4: Do cedar raised beds need a liner or base protection?
Yes, adding a landscape fabric liner or jute matting to your DIY cedar raised bed is highly recommended. It helps prevent weeds from entering the bed and extends the life of the cedar by creating a barrier between the soil and wood. Just ensure the liner has small holes for water drainage.
Q5: Can I paint or seal my cedar raised bed?
Absolutely. Sealing your DIY cedar raised bed with eco-friendly linseed or tung oil maintains the natural color and protects it from weathering. While cedar is naturally rot-resistant, a protective finish helps retain its fresh, reddish tone and prevents cracking over time. Avoid chemical-based paints, especially if you’re growing edible plants.
Q6: What’s the best size for a DIY cedar raised bed in small spaces?
For compact gardens or patios, a 3 ft × 3 ft or 4 ft × 2 ft cedar raised bed works perfectly. This dimension allows easy access from all sides without stepping into the soil. You can also connect multiple smaller beds in a modular layout for expansion later.
Q7: Why is cedar better than pine or composite wood?
Cedar is superior because it’s naturally durable, lightweight, and toxin-free. Unlike pressure-treated pine, it doesn’t leach chemicals into your garden soil. A DIY cedar raised bed built with red or white cedar offers a safe and sustainable solution for growing organic produce while keeping pests and decay at bay.
Q8: Can I move my cedar raised bed once it’s filled?
It’s not advisable to move a fully filled DIY cedar raised bed due to the heavy soil weight. However, modular or elevated designs with detachable panels are ideal if you need portability. For standard beds, choose your permanent spot before filling to avoid damage or soil spillage later.
Q9: How do I maintain my cedar raised bed through the seasons?
Maintenance is easy — top up soil every spring, rotate crops, and clean the wooden edges annually. If you live in a region with harsh winters, cover your DIY cedar raised bed with a breathable tarp or mulch layer to protect it from frost and erosion.
💬 Conclusion – Crafting Beauty and Strength with a DIY Cedar Raised Bed
A DIY cedar raised bed is more than a weekend project — it’s a long-term investment in your gardening journey. It combines practicality, elegance, and sustainability in one thoughtful creation. From compact balconies to large backyard plots, cedar beds transform ordinary soil into a thriving oasis of life and color.
What makes a DIY cedar raised bed truly special is its versatility. You can tailor each design — classic, tiered, elevated, modular, or decorative — to fit your personal style, available space, and crop needs. Every board you cut, every screw you tighten, and every seed you plant brings you closer to a sense of connection with nature that few experiences can match.
Cedar’s natural resilience ensures that your garden remains beautiful for years, requiring minimal maintenance while enriching your soil and surroundings. It’s the perfect blend of strength, simplicity, and sustainability — exactly what modern gardeners crave.
So, whether you’re a first-time builder or a seasoned gardener seeking inspiration, start small, dream big, and let your DIY cedar raised bed become the cornerstone of your gardening sanctuary.🌱 Now it’s your turn — which cedar raised bed design will you try first? Share your ideas, photos, and favorite layouts with us at Gardeniva.com, and inspire others to grow greener, smarter, and more beautifully.
💡Looking for something different? Check out our latest post here: https://gardeniva.com/wifi-planters-that-water-themselves/